.


eXMP-SynqNet QS Guide
Linux

Changing Network Interface Parameters


1. When you power up the eXMP-SynqNet, the console terminal should display the BIOS information.


2. After the BIOS information is displayed, the GRUB bootloader screen will be displayed. The default boot option will be highlighted and will auto-boot this option after waiting for 5 seconds.

Advanced Linux users can edit the '/boot/grub/grub.conf' to specify a new or different boot option, if necessary.


3. As the default option is booted and the Linux kernel is loaded, the Linux kernel messages will appear in the terminal. The final message will prompt you to press a key to start a shell on the terminal.


4. Once the console is activated, use the vi editor to change the network interface settings in the 'etc/init.d/network' file. This is a small file, and there are BOLD comments marking the location to set the desired IP address, subnet mask, broadcast address, and network routing address. Be sure to write the changes to the file before quitting (:w) and (:q).


5. After saving the valid network interface parameters, reboot the eXMP using the 'reboot' command, or use the 'shutdown' command and then cycle power. After the eXMP completes the Linux boot process, the eXMP should be accessible from another computer on the local area network. The eXMP runs an anonymous FTP server, and a telnet server.

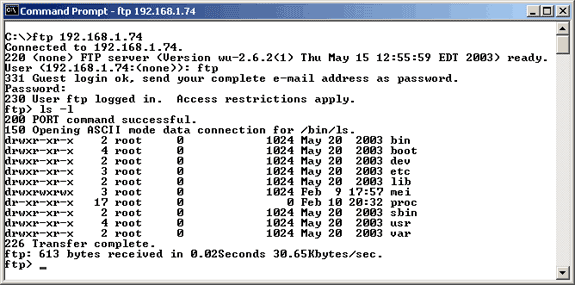
To connect to the eXMP FTP server from a Windows PC, type the following from a Command Prompt (using the new IP address for the eXMP):

         ftp 192.168.1.74

Use 'anonymous' or 'ftp' as the login name, the password you choose does not matter.

Full read/write, get/put access is allowed with the eXMP, in every directory. Here is a screenshot of an ftp session:


6. Accessing the eXMP via Telnet provides an eXMP shell with unlimited access. To connect to the eXMP FTP server from a Windows PC, type the following from a Command Prompt (using the new IP address for the eXMP):

         telnet 192.168.1.74

The session should look like this:


Previous | Next

       Legal Notice  |  Tech Email  |  Feedback
      
Copyright ©
2001-2021 Motion Engineering