|
|
Quick
Start Guide
XMP-SynqNet Controller |
CPCI
Compact PCI (CPCI) utilizes a card-type computer chassis,
having a multi-pin backplane. The main advantage is smaller sizing and
simplified access to electronics. There are two sizes of the CPCI: -6U
and -3U. (CPCI-3U controllers are still pending from MEI.) The CPCI-6U
is the larger of the two form factors and connects to the backplane bus
via the jumper connector at J1. The installation of the CPCI-6U is described
below.
There are currently three types of XMP-SynqNet-CPCI
controllers:
 |
XMP-SynqNet-CPCI-uD
PN: T011-0003
|
 |
XMP-SynqNet-CPCI-RJ-CAN
PN: T011-0004
|
 |
XMP-SynqNet-CPCI-Rear
I/O
PN: T011-0005
|
Remove Black Caps
Each board has two screws which have been covered with
black caps in order to ensure that the screw was not lost during shipment.
Remove the black caps on the screws.
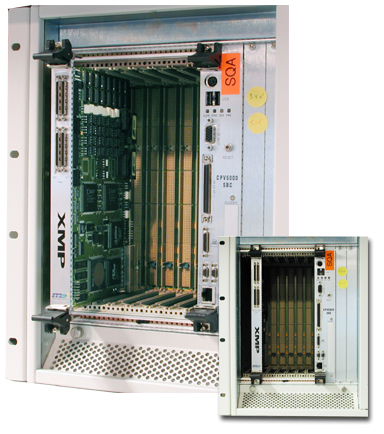
Install PCB into the host machine
Push the backplane bus connector
at J1 into the mating connector on the host machine.
Use the locks on both ends of the bracket
to fully secure the board to the host machine. Align the bracket with
the machine's frame and push the connector inwards until it snaps in place.
To unlock the connector, press the red lever and push out.

Locked Position
|
To unlock connector
|
Unlocked Position
|
For added security, use a Philips screwdriver
and fasten the outer screw on each connector to the system's frame.
Here is a photo of a properly installed XMP-CPCI controller.
Previous | Next
|